10 July 2014

Create bootable USB drives the easy way
![[rufus icon]](http://rufus.akeo.ie/rufus-128.png)
Rufus
Create bootable USB drives the easy way
![[rufus screenshot]](http://rufus.akeo.ie/pics/rufus_en.png)
Rufus is an utility that helps format and create bootable USB flash drives, such as USB keys/pendrives, memory sticks, etc.
It can be especially useful for cases where:
- you need to create USB installation media from bootable ISOs (Windows, Linux, UEFI, etc.)
- you need to work on a system that doesn't have an OS installed
- you need to flash a BIOS or other firmware from DOS
- you want to run a low-level utility
Despite its small size, Rufus provides everything you need!
Oh, and Rufus is fast. For instance it's about twice as fast as UNetbootin, Universal USB Installer orWindows 7 USB download tool, on the creation of a Windows 7 USB installation drive from an ISO. It is also marginally faster on the creation of Linux bootable USB from ISOs. (1)
A non exhaustive list of Rufus supported ISOs is also provided at the bottom of this page. (2)
A non exhaustive list of Rufus supported ISOs is also provided at the bottom of this page. (2)
 CALLING ON TRANSLATORS!
While Rufus is still being localized in multiple languages (to find the ones that are lined up, see the table here), I am exceedingly interested in finding translators for this webpage, especially forTraditional Chinese and Korean.
If you speak one of these languages, and would like users of Rufus to see this page localized, please have a look here.
Last updated 2014.06.08:
- Rufus 1.4.9 (615 KB)
- Direct Link
- Other versions
Supported Languages:
| Bahasa Indonesia | , | Bahasa Malaysia | , | Български | , | Dansk | , | Deutsch | , | Ελληνικά | , | English | , | Español | , |
| Français | , | Hrvatski | , | Italiano | , | Latviešu | , | Lietuvių | , | Magyar | , | Nederlands | , | Polski | , | Português | , |
| Português do Brasil | , | Русский | , | Română | , | Slovensky | , | Slovenščina | , | Suomi | , | Svenska | , | Türkçe | , |
| العربية | , | 简体中文 | , | 正體中文 | , | 日本語 | , | 한국어 | . |
System Requirements:
Windows XP or later, 32 or 64 bit doesn't matter. Once downloaded, the application is ready to use.
I will take this opportunity to express my gratitude to the translators who made it possible for Rufus, as well as this webpage, to be translated in various languages. If you find that you can use Rufus in your own language, you should really thank them!
22 April 2014
How to Create a WiFi Hotspot Using the Command Prompt
How to Create a WiFi Hotspot Using the Command Prompt..
Now-a-days internet connectivity has become one of the things that we need the most. It would be nice if we can use our computer's fast internet Connection. So guys the solution is Wireless Hosted Network. This concept of Wireless Hosted network was introduced in Windows 7. By using this feature we can easily create a virtual wireless adapter.To do this we only require a CMD(Command Prompt) with Administrator privileges. And best of all you can connect to another wifi when Hosted Network is running. This process describes some of the commands that are available only in Windows 7 or Windows 8 Ready PC.
- 1Start. Click on start button on your desktop or press the WindowsKey on keyboard.
-
2Search. Type "cmd" in search box and right click on command prompt. Select Run as Administrator.
-
3For Beginners. You are accessing the Admin privileges so you will be asked for User Account Control. Click on Yes. Now you have command prompt running.
-
4Device Check. Type
netsh wlan show driversin command prompt and press enter.
It will show the output like the image.
In the outputHosted network supported :Yesmeans that your computer supports hosted networks. Verify this. -
5Create. Type
netsh wlan set hostednetwork mode=allow ssid=Hotspotname key=passwordin Command prompt. This will create a Hotspot but it is currently offline. -
6Start. Type
netsh wlan start hostednetworkin command prompt to start the hotspot you just created. -
7Stop. Type
netsh wlan stop hostednetworkin command prompt to stop the hotspot. -
8Details. Type
netsh wlan show hostednetworkto check the hotsopt status. -
9Internet. To share your internet connection on this hotspot go to the Network and sharing center and click on Change adapter setting. Here right click on the Connection that you use to connect to internet and select properties. In properties go to Sharing tab and check the box "Allow other network users to connect through this computer's internet connection and select the network connection name that is used by your hotspot.(For this check the Network Connection Window and look for Connection which says Microsoft Hosted Network Virtual Adapter). And save it. Now your inter net connection is shared.
- 10.that's all now a hotspot created with encrypted......


Subscribe to:
Comments (Atom)
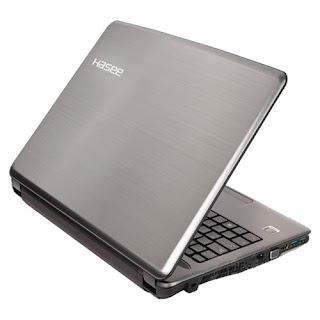
Tamilnadu Government Free Hasee Laptop hec41 Driver LAN DRIVER WORKING: CLICK TO DOWNLOAD
-
 After long search i found the correct soluion for formatting android os 2.1 to 2.3 for sony ericsson W8/X8. 1: ROOT Root your ...
 -
 Tamilnadu Government Free Hasee Laptop hec41 Driver LAN DRIVER WORKING: CLICK TO DOWNLOAD
